This article contains affiliate links. We may earn a commission at no extra cost to you.
🏆 Top DIY Security System Picks 2026
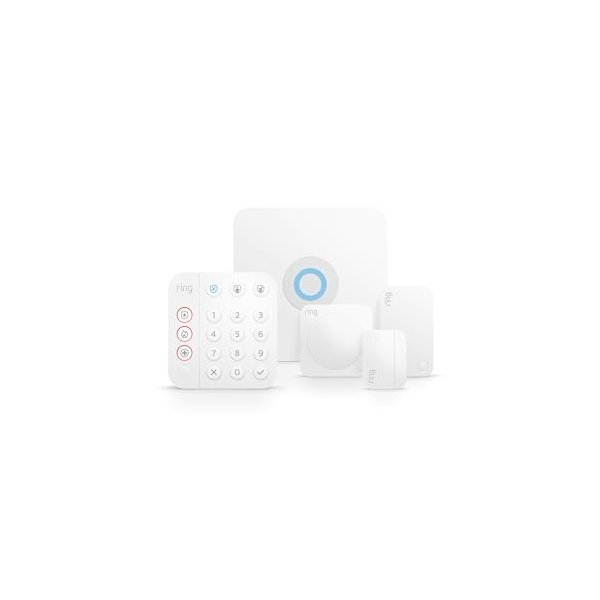
🥇 Best Overall: Ring Alarm 8-Piece Kit – Affordable, easy setup, professional monitoring available
💰 Best Budget: Wyze Home Monitoring System – Under $100, no monthly fees required
🔋 Best Wireless: SimpliSafe 9-Piece Wireless System – 100% wireless, battery backup, cellular connection
Breaking into the world of home security doesn’t mean breaking the bank or waiting weeks for professional installation. A smart home security system DIY approach lets you build comprehensive protection for your home at a fraction of the cost—often saving $500-$1,000 compared to professionally installed systems.
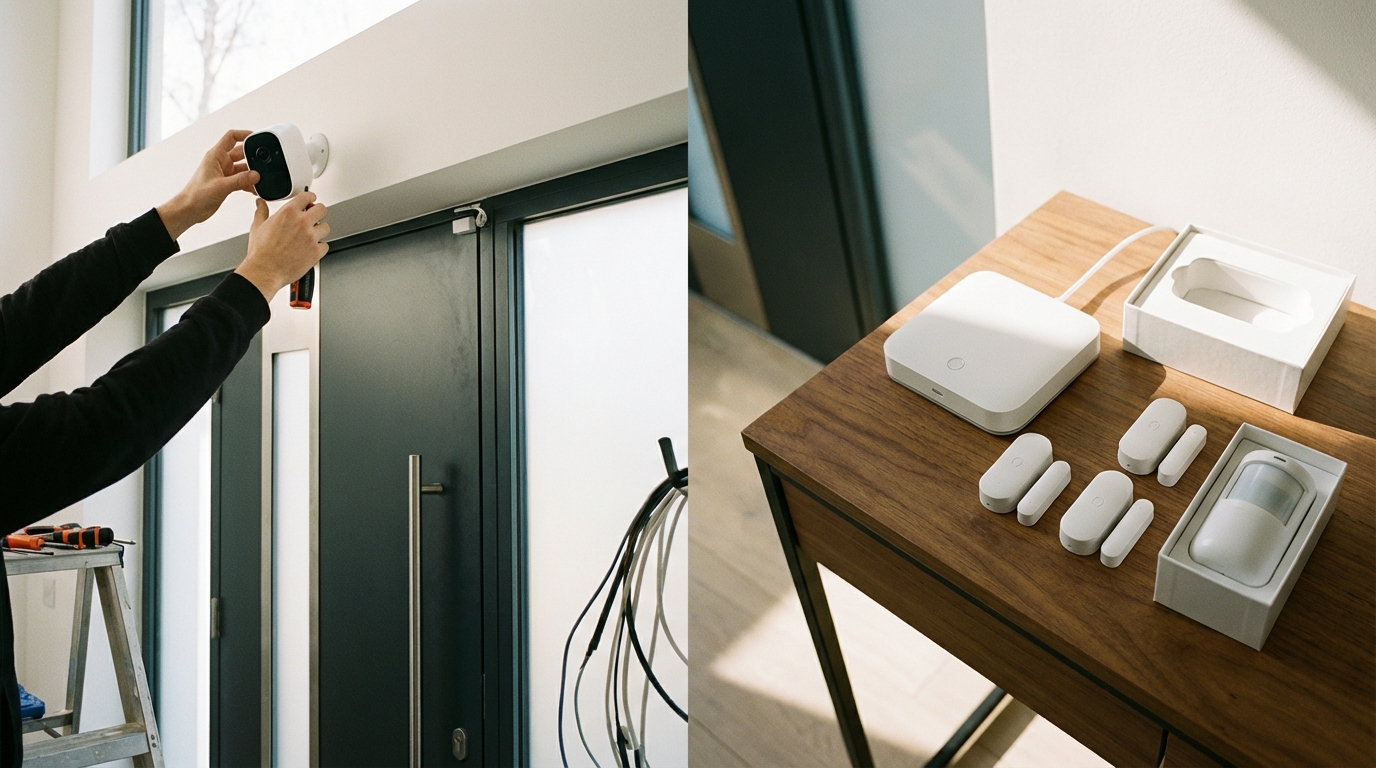
The beauty of modern DIY security systems is their simplicity. With wireless components, smartphone apps, and plug-and-play technology, you can set up a complete security system in an afternoon without drilling holes or running cables through walls. Whether you’re protecting an apartment, starter home, or larger property, this guide will walk you through everything you need to know to install your own smart security system with confidence.
Why Choose a DIY Smart Home Security System?
Cost Savings That Actually Matter
Professional security systems typically charge $99-$299 for installation, plus monthly monitoring fees ranging from $30-$60. DIY systems eliminate installation costs entirely and offer optional monitoring for $10-$30 per month—or no monitoring fee at all if you choose self-monitoring.
Over a three-year period, you’re looking at savings of $1,500-$3,000 compared to traditional professionally installed systems. That’s substantial money that could go toward additional sensors, cameras, or other smart home devices.
Complete Control and Flexibility
When you install your own system, you decide exactly where each component goes. Want to add an extra motion sensor in the hallway? Done. Need to relocate a camera? No problem. DIY systems grow and adapt with your needs without service calls or technician appointments.
You also avoid lengthy contracts. Most professional security companies lock you into 3-5 year agreements with hefty cancellation fees, while DIY systems operate month-to-month or contract-free.
Essential Components of a DIY Security System
The Base Station (Control Hub)
Every smart home security system DIY setup starts with a central hub or base station. This brain of your system connects all your sensors, cameras, and devices while communicating with your smartphone and the monitoring service.
According to specifications from leading manufacturers, modern base stations include backup batteries (lasting 24-48 hours during power outages) and cellular backup (maintaining connectivity if your internet goes down). Look for models that support multiple communication protocols like Z-Wave, Zigbee, or Wi-Fi to ensure compatibility with various sensors.
Door and Window Sensors
These are your first line of defense. Each sensor consists of two pieces: one attached to the door or window frame, the other to the moving part. When separated, they trigger an alert.
Quality sensors should have a range of at least 300-500 feet to the base station and battery life of 1-3 years. Based on user reviews, adhesive-mounted sensors work well for most applications, though screw-mounted options provide extra security for high-risk entry points.
Motion Detectors
Motion sensors fill the gaps between entry point sensors, detecting movement inside your home. Modern PIR (Passive Infrared) sensors can distinguish between pets under 40-80 pounds and human intruders, reducing false alarms.
Position these in high-traffic areas like hallways, staircases, and main living spaces for maximum coverage.
Security Cameras (Indoor and Outdoor)
Cameras serve dual purposes: deterring potential intruders and providing visual verification of alerts. For DIY installations, wireless cameras with rechargeable batteries or solar panels offer the most flexibility.
Key specs to consider include resolution (1080p minimum, 2K or 4K preferred), night vision range (25-30 feet for outdoor cameras), field of view (110-160 degrees), and local or cloud storage options.
Step-by-Step DIY Installation Guide
Step 1: Plan Your Security Coverage
Before ordering equipment, walk through your home and identify vulnerable points. Every ground-floor door and window should have a sensor. Sliding doors need specialized sensors or glass break detectors.
Map out camera positions to cover main entry points, driveways, and high-value areas inside. Consider motion sensor placement in interior hallways that intruders would need to cross.
Create a simple floor plan noting where each component will go. This planning phase prevents ordering too few (or too many) components.
Step 2: Choose Your System and Order Components
Based on your security plan, select a system that offers the right combination of components and features. Most DIY systems sell starter kits with options to add individual components.
Factor in your monitoring preference: self-monitoring (you receive alerts directly), professional monitoring (a monitoring center responds to alarms), or a hybrid approach. Each system has different monitoring options and costs.
Step 3: Install the Base Station
Position your base station centrally in your home for optimal sensor range. It needs access to power and should connect to your router via Ethernet for the most reliable connection (though Wi-Fi works for most systems).
Keep it away from large metal objects or thick concrete walls that might interfere with wireless signals. A main floor closet, utility room, or home office works well.
Follow the manufacturer’s app-based setup process, which typically takes 10-15 minutes. You’ll create an account, name your system, and connect it to your network.
Step 4: Install Door and Window Sensors
Clean the mounting surfaces with rubbing alcohol before applying adhesive sensors. Position the sensor on the frame and the magnet on the door or window, keeping the alignment marks within 1-2 inches of each other.
Use the system app to add each sensor, giving it a clear name (“Front Door,” “Kitchen Window”). Test each sensor by opening and closing to verify the connection.
For windows you plan to open, place sensors on the side frames where they won’t interfere with operation.
Step 5: Mount Motion Detectors
Install motion sensors 6-8 feet high in corners for optimal coverage. They should face the areas you want to monitor, not windows (which can cause false alarms from passing cars or animals).
Angle them slightly downward to cover floor space effectively. Most DIY systems use adhesive mounting or small screws.
Configure pet immunity settings in the app if you have animals, adjusting sensitivity to prevent false triggers.
Step 6: Position and Configure Cameras
Outdoor cameras should mount under eaves or soffits for weather protection and cover main entry points. Aim for 7-10 feet high—high enough to prevent tampering but low enough for clear facial identification.
Indoor cameras work well in main living areas, stairways, or anywhere valuable items are kept. Avoid pointing cameras directly at windows due to glare and reflection issues.
Connect cameras to Wi-Fi through the app, adjust motion detection zones to ignore busy streets or trees, and set up recording schedules or continuous recording based on your preference.
Step 7: Test the Complete System
Once everything is installed, test your entire smart home security system DIY setup thoroughly. Trigger each sensor individually and verify you receive notifications on your smartphone.
Walk through motion detector zones at different speeds. Test cameras both during daylight and at night. Verify that the siren sounds when the system is armed and a sensor triggers.
Simulate a power outage by unplugging the base station to confirm battery backup works, and test the panic button or emergency features.
Top DIY Smart Home Security Systems Compared
| System | Starting Price | Monthly Monitoring | Professional Monitoring | Key Features |
|---|---|---|---|---|
| Ring Alarm Pro | $299 | $20/month or $200/year | Yes (optional) | Built-in eero Wi-Fi 6 router, cellular backup, Alexa integration |
| SimpliSafe | $229 | $18-$28/month | Yes (optional) | No contract required, fast emergency response times, compatible with many smart devices |
| Wyze Home Monitoring | $88 | $10/month | Yes (optional) | Most affordable option, works with existing Wyze cameras, HMS certification |
| Abode Smart Security | $199 | $20/month or self-monitor free | Yes (optional) | No contracts, works with 200+ smart home devices, professional grade |
| Eufy Security | $180 | None (self-monitor only) | No | No monthly fees ever, local storage, strong privacy focus |
Ring Alarm Pro: Best for Amazon Ecosystem Users
Pros: – Integrated Wi-Fi 6 router replaces your existing router – Seamless integration with Ring cameras and doorbells – Built-in Alexa functionality – 24/7 professional monitoring available – Cellular backup included with subscription
Cons: – Requires subscription for many features including video storage – More expensive monitoring than some competitors – Limited compatibility with non-Ring devices
Verdict: According to user reviews, Ring Alarm Pro excels for those already invested in Amazon’s ecosystem. The dual function as a security system and mesh router provides excellent value, though the subscription-dependent features may not appeal to everyone.
SimpliSafe: Best Overall for Most Users
Pros: – Fast professional monitoring response (widely reported as industry-leading) – No long-term contracts required – Works with Google Assistant and Alexa – Easy self-installation rated highly by users – Good customer support reputation
Cons: – Sensors use proprietary connection, limiting third-party options – Camera integration costs extra – Some features locked behind subscription tiers
Verdict: Based on expert consensus and thousands of user reviews, SimpliSafe strikes the best balance between features, cost, and reliability for most DIY installers. The no-contract flexibility and responsive monitoring make it particularly appealing.
Wyze Home Monitoring: Best Budget Option
Pros: – Exceptionally affordable entry price – $10/month monitoring is the lowest professional rate – Works seamlessly with Wyze cameras and sensors – HMS certified for professional monitoring standards – No contracts
Cons: – Smaller product ecosystem than competitors – Less sophisticated home automation integration – Newer to the security market
Verdict: For budget-conscious users, Wyze offers legitimate professional monitoring at a fraction of typical costs. While the ecosystem is smaller, specs and user feedback indicate reliable performance for basic to moderate security needs.
Abode Smart Security: Best for Smart Home Integration
Pros: – Works with 200+ third-party devices and platforms – HomeKit, Alexa, and Google Assistant compatible – Professional-grade sensors and components – Can self-monitor completely free – Strong automation capabilities
Cons: – Higher upfront cost for components – More complex setup for advanced features – Learning curve steeper than simpler systems
Verdict: According to specifications and user experiences, Abode shines for tech-savvy users who want deep smart home integration. The ability to create complex automations and work with virtually any smart device makes it highly flexible.
Eufy Security: Best for Privacy-Conscious Users
Pros: – Zero monthly fees—ever – Local storage means your data stays with you – Strong encryption and privacy policies – Works without internet connection for basic functions – Solid camera quality based on reviews
Cons: – No professional monitoring option available – You’re responsible for responding to all alerts – Smaller support network
Verdict: For users who prioritize privacy and want to avoid subscriptions, Eufy delivers according to user consensus. The trade-off is handling all monitoring yourself, which works well for those who are home frequently or want complete data control.
Advanced DIY Security Features to Consider
Smart Locks and Keypad Entry
Pairing smart locks with your security system creates seamless arming and disarming. Many systems automatically arm when you lock the door and disarm when you unlock with your code.
Popular options include August, Yale, and Schlage smart locks with Z-Wave or Wi-Fi connectivity. Look for auto-lock features, temporary access codes for guests, and battery life of 6-12 months.
Glass Break Detectors
For rooms with large windows or glass doors, glass break sensors detect the specific sound frequency of breaking glass. One detector can typically cover a 25-foot radius, protecting multiple windows.
These complement door/window sensors by detecting break-ins even if the intruder doesn’t open the entry point.
Environmental Monitoring
Many smart home security system DIY setups now include environmental sensors for smoke, carbon monoxide, water leaks, and temperature extremes. This transforms your security system into comprehensive home protection.
These sensors can trigger alerts and automatic responses, like shutting off water mains when a leak is detected or alerting you to freezing temperatures that might burst pipes.
Video Doorbell Integration
Video doorbells serve as your front door’s eyes and ears. They detect visitors, allow two-way communication, and record package deliveries or suspicious activity.
Most security systems now integrate with or include video doorbells. Key features include 1080p+ resolution, HDR for clear images in bright sunlight, package detection, and pre-roll recording that captures seconds before motion is detected.
Cost Breakdown: What You’ll Actually Spend
Initial Equipment Investment
A basic DIY system protecting a typical 3-bedroom home costs $200-$400 for starter equipment including: – Base station with backup battery – 5-10 door/window sensors – 2-3 motion detectors – One indoor camera
Mid-range setups run $400-$700 adding: – Outdoor cameras (1-2 units) – Additional sensors for all entry points – Glass break detector – Smoke/CO detector
Comprehensive systems reach $700-$1,200 with: – Multiple outdoor cameras with spotlights – Video doorbell – Smart locks – Environmental sensors – Extra indoor cameras
Ongoing Monitoring Costs
Self-monitoring: $0/month (you respond to alerts yourself)
Basic professional monitoring: $10-$20/month – 24/7 monitoring center – Emergency dispatch – Cellular backup
Premium monitoring: $20-$30/month – All basic features – Video storage (usually 30-60 days) – Advanced smart home integration – Extended warranties
Total First-Year Cost Comparison
DIY with self-monitoring: $200-$1,200 (equipment only) DIY with professional monitoring: $320-$1,560 ($120-$360 in monitoring fees) Professional installation system: $1,500-$3,000+ (installation, equipment, monitoring)
The savings become more dramatic over time as DIY systems avoid the ongoing higher monthly fees of traditional professionally installed systems.
Common DIY Installation Mistakes to Avoid
Inadequate Coverage Planning
The most frequent mistake is underestimating the number of sensors needed. According to security experts, every ground-floor opening should have a sensor, not just main doors.
Don’t forget basement windows, garage doors, and less obvious entry points. Burglars often target these overlooked areas specifically because homeowners neglect them.
Poor Camera Positioning
Mounting cameras too high eliminates clear facial identification. The sweet spot is 7-10 feet, angled slightly downward. Position them to cover approach paths, not just the area immediately at the door.
Also avoid backlighting issues—cameras pointed toward bright skies or windows produce silhouettes rather than clear images.
Forgetting to Test Regularly
Install-and-forget is a recipe for failure. Test your system monthly by triggering sensors and verifying notifications arrive. Replace batteries proactively based on the app’s battery status rather than waiting for failures.
Update firmware when prompted—these updates often include security patches and performance improvements.
Ignoring Wireless Interference
Thick walls, metal objects, and wireless interference can create dead zones. If sensors show weak signals in the app, consider adding a range extender or repositioning the base station.
Some systems offer wireless range extenders specifically designed for security sensors.
Maintaining Your DIY Security System
Regular Battery Maintenance
Most wireless sensors run on CR123A or AA batteries lasting 1-3 years. Your system app will show battery levels—replace batteries when they drop below 20% rather than waiting for failures.
Keep spare batteries on hand. There’s nothing worse than a low battery warning at midnight when stores are closed.
Firmware and Software Updates
Enable automatic updates if your system offers them. These updates patch security vulnerabilities, improve detection algorithms, and add new features.
Check the app monthly for any pending updates you need to manually approve.
Cleaning Cameras and Sensors
Outdoor cameras accumulate dirt, spider webs, and water spots that degrade image quality. Clean lenses monthly with a microfiber cloth and check that nothing blocks the view.
Wipe down motion sensors and door/window sensors annually to prevent dust buildup from affecting performance.
System Tests and Drills
Run a complete system test quarterly. Trigger every sensor, test cameras during day and night, verify siren volume, and confirm monitoring center response (call ahead to let them know you’re testing).
Practice your emergency response plan with family members so everyone knows how to arm, disarm, and respond to alarms.
Smart Home Integration Possibilities
Voice Assistant Control
Modern DIY security systems integrate with Alexa, Google Assistant, or Siri. You can arm/disarm systems with voice commands, check camera feeds on smart displays, and include security in broader automation routines.
Create voice commands like “Alexa, goodnight” that arms the system, locks doors, turns off lights, and adjusts the thermostat simultaneously.
Automation Routines
Smart home security system DIY setups shine when automated. Create rules like: – Arm the system automatically when everyone leaves (using phone location) – Turn on all lights and trigger siren when motion is detected while armed – Send video clips to your phone when doorbell rings – Adjust thermostat to away mode when system arms
These automations make security truly passive—
🎯 Final Verdict: Which DIY Security System Should You Choose?
After comparing the top DIY security systems, here’s our recommendation based on your needs:
Choose Ring Alarm Pro if you want the most complete solution with built-in Wi-Fi 6 router, excellent Alexa integration, and professional monitoring options. Best for families who value reliability and comprehensive features.
Choose Wyze Home Monitoring if you’re on a tight budget or starting small. The $88 starter kit works with your existing Wyze cameras and offers optional professional monitoring for just
0/month. Perfect for renters and first-time DIY installers.
Choose Abode Smart Security if you have an existing smart home with multiple brands and want maximum flexibility. Works with 200+ devices and includes free self-monitoring forever. Ideal for tech enthusiasts who want complete control.
Choose SimpliSafe if you want no contracts, fast emergency response, and a middle-ground price point. Great for homeowners who want reliability without long-term commitments.
Whichever system you choose, the DIY approach saves you hundreds compared to professional installation while giving you complete control over your home security. Start with a basic kit and expand as your needs grow!